
Floor plan & tables
Draw your room once; the register runs on it.
Three screens, and which is which
"The floor" means three different screens in TableTurn, and knowing which one you're on saves a lot of confusion.
The floor plan builder (Dine-in tables & floor plan → Floor plan) is where you *draw* the room. You use it once at setup and then rarely.
The register's floor is what servers work on all shift – tap a table to start or resume its order. It's the same room you drew.
The back-office Floor view is the manager's read-only overview: every table as a tile with its live order and kitchen status, refreshing on its own.
The floor plan builder and Table QR codes are two tabs on the same page, working on the same tables. A table you place on the plan is the same table whose QR you print.
Create your tables
Before you can draw a room you need tables in it. Turn on Accept dine-in (table) orders, then add them.
- 1Add one at a time by name – Table 5, Patio 2, Bar 3. Names are free text, so use whatever your staff actually say.
- 2Or use Quick add: type a number and tap Add "Table 1…N" to create a numbered run in one go.
- 3Each table immediately gets its own QR code.
Online ordering has to be on first – the table QR codes point at your public menu, so without it there's no link for them to carry. You'll see an amber note if it isn't set up yet.
Table QR codes
Every table's QR opens your menu pre-tagged to that table, so a dine-in guest can order and pay from their phone and the order arrives already knowing where to go.
The QR card is laid out to be printed and stood on the table: the table name large above the code, the name again below it, and Scan to order at your table. Print all QR codes prints the lot as placards in one pass.
Each card also has three small controls: a power toggle to disable a table without deleting it (a patio that closes for winter), copy link to grab the URL for a sign or a mailout, and delete.
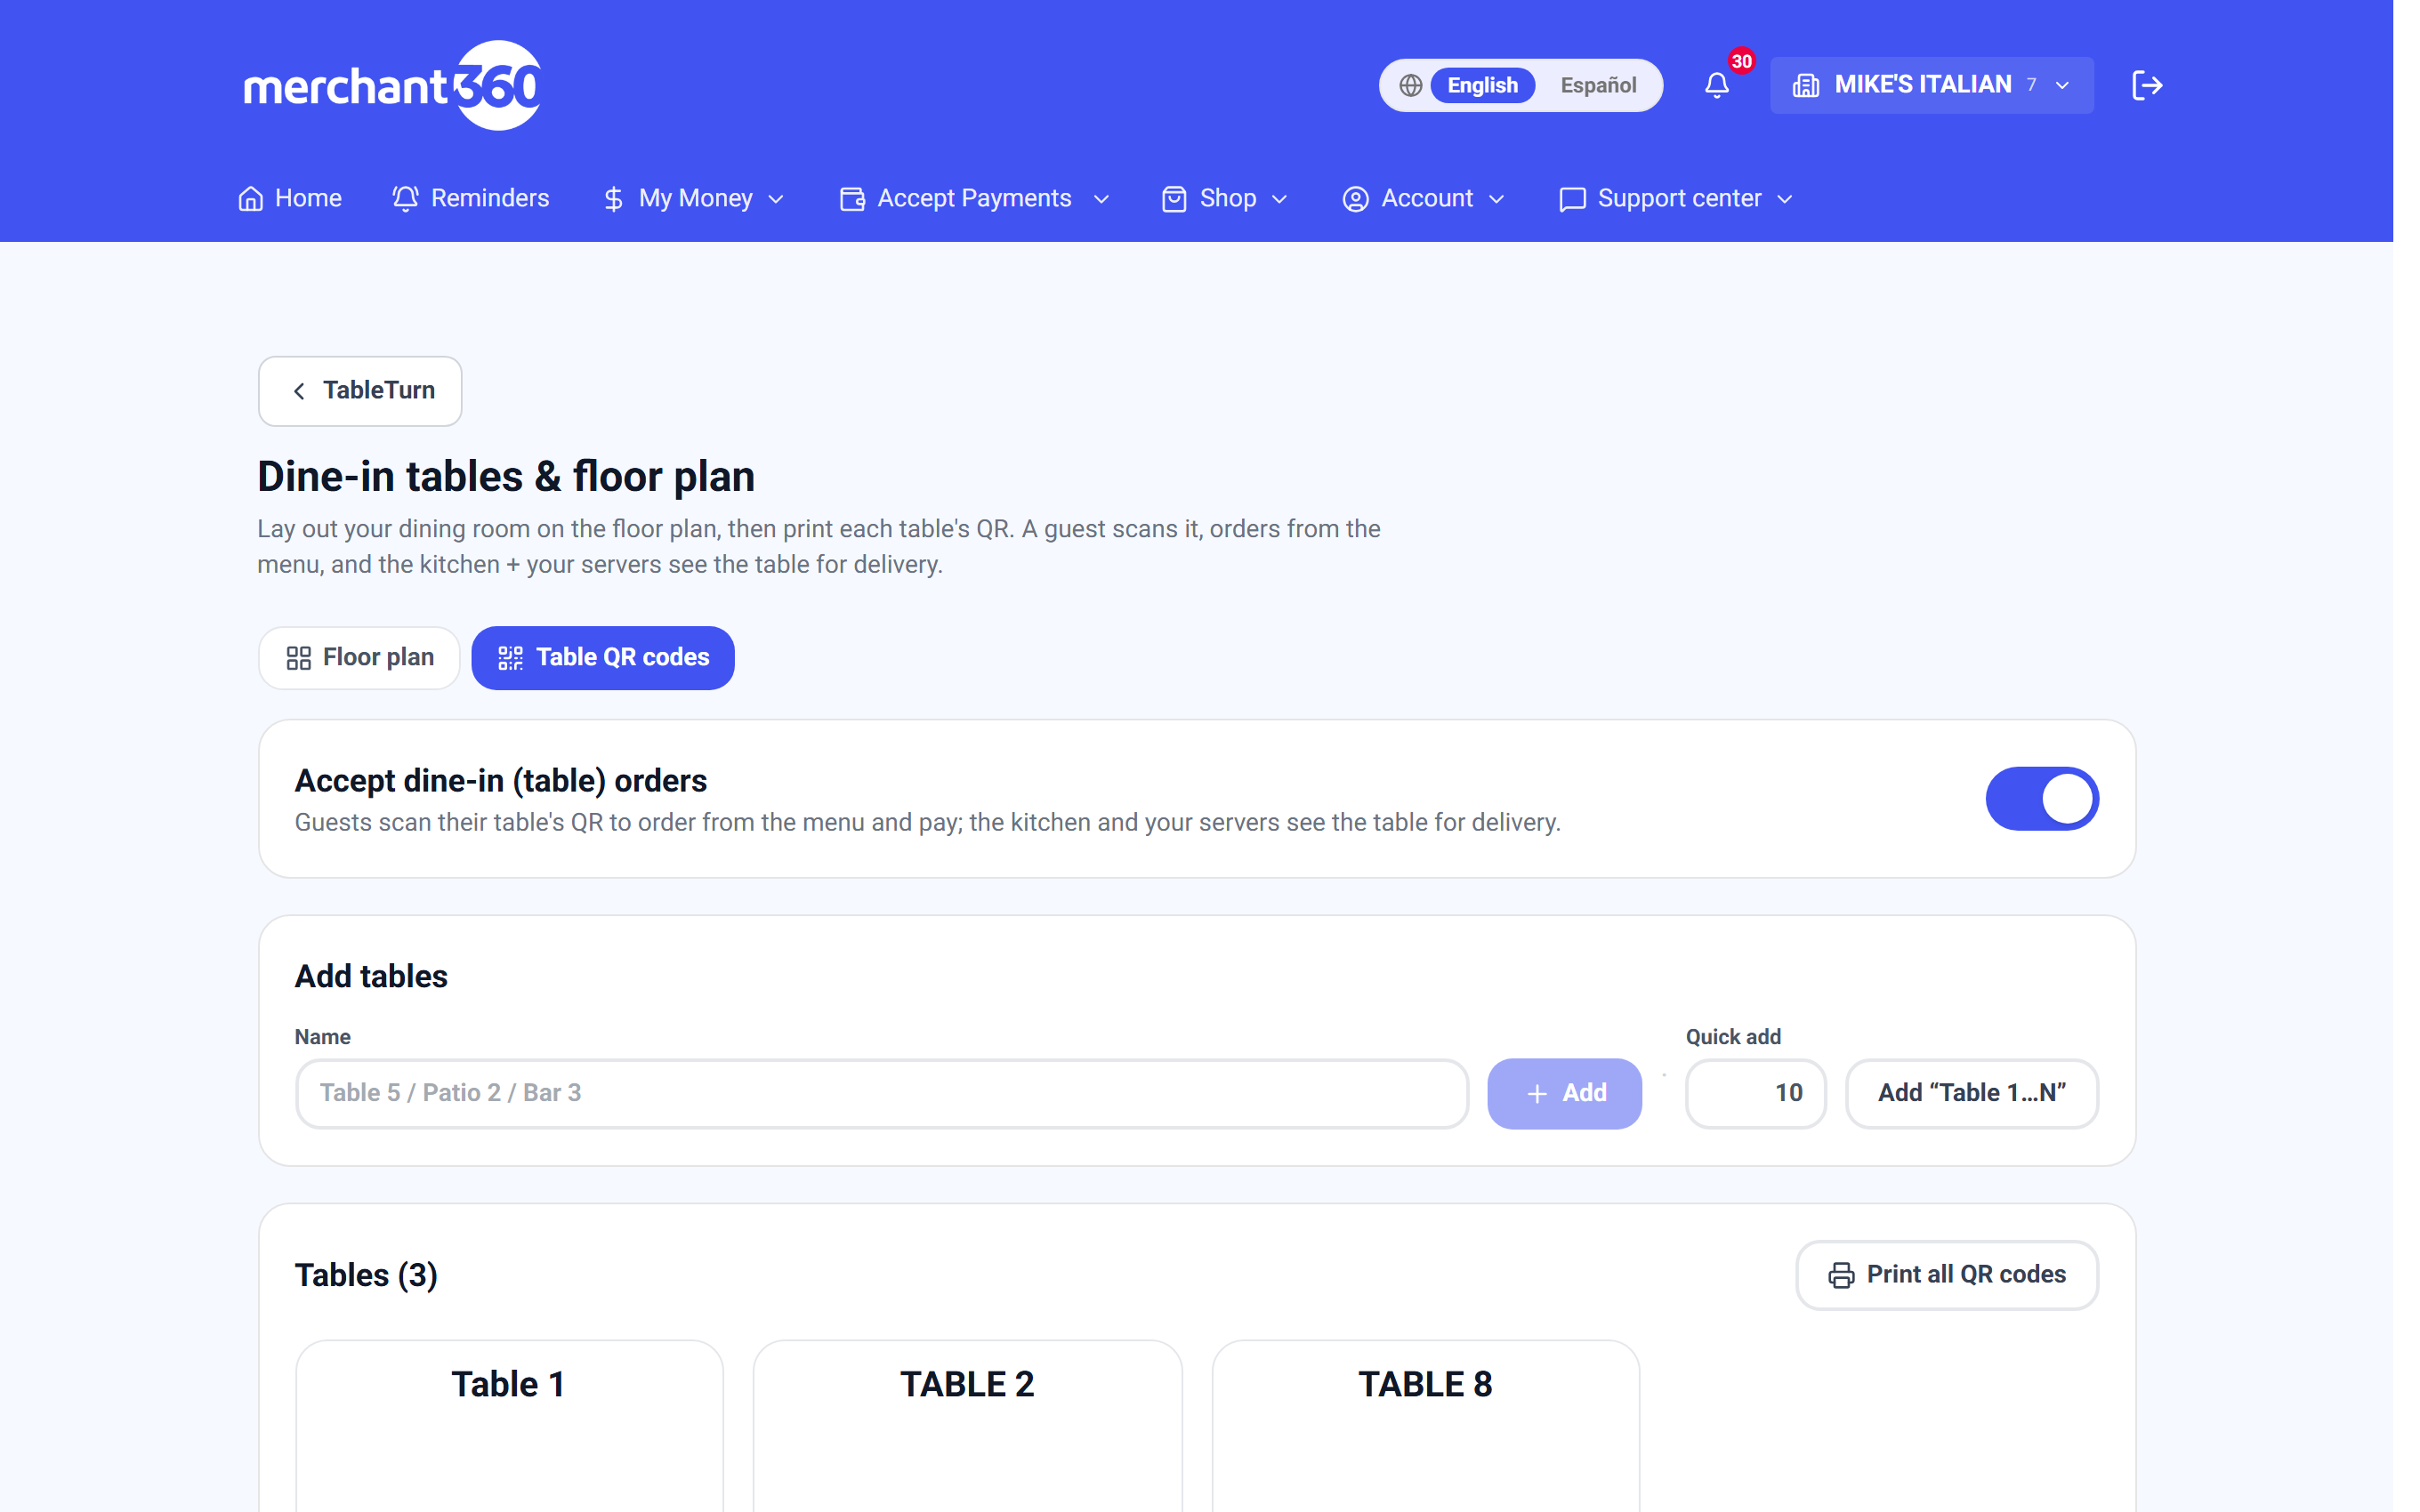
Disable rather than delete when a table goes out of service. Deleting throws away the QR, so any placard already printed for it stops working.
Drawing the room
The builder is a canvas with a palette underneath, and it behaves like a drawing tool: drag to move, drag the blue corner handle to resize, tap empty space to deselect.
Start with service areas – Main Dining, Bar, Patio. Each is a tab across the top; double-click a tab to rename it. Areas matter because servers filter the floor by them during service.
Tap a preset in the Tables palette to drop it in: Stool · 1, Square · 2, Square · 4, Round · 4, Round · 6, Booth · 6, Long · 8. Chairs are drawn around each table automatically from its seat count, which is what makes the plan read as a room rather than a grid of boxes.
The Decor palette adds the things that make it recognisable: Wall, Bar, L-bar, Pillar, Door, Plant. Decor isn't bookable – it's there so a server can find the table they're looking at.
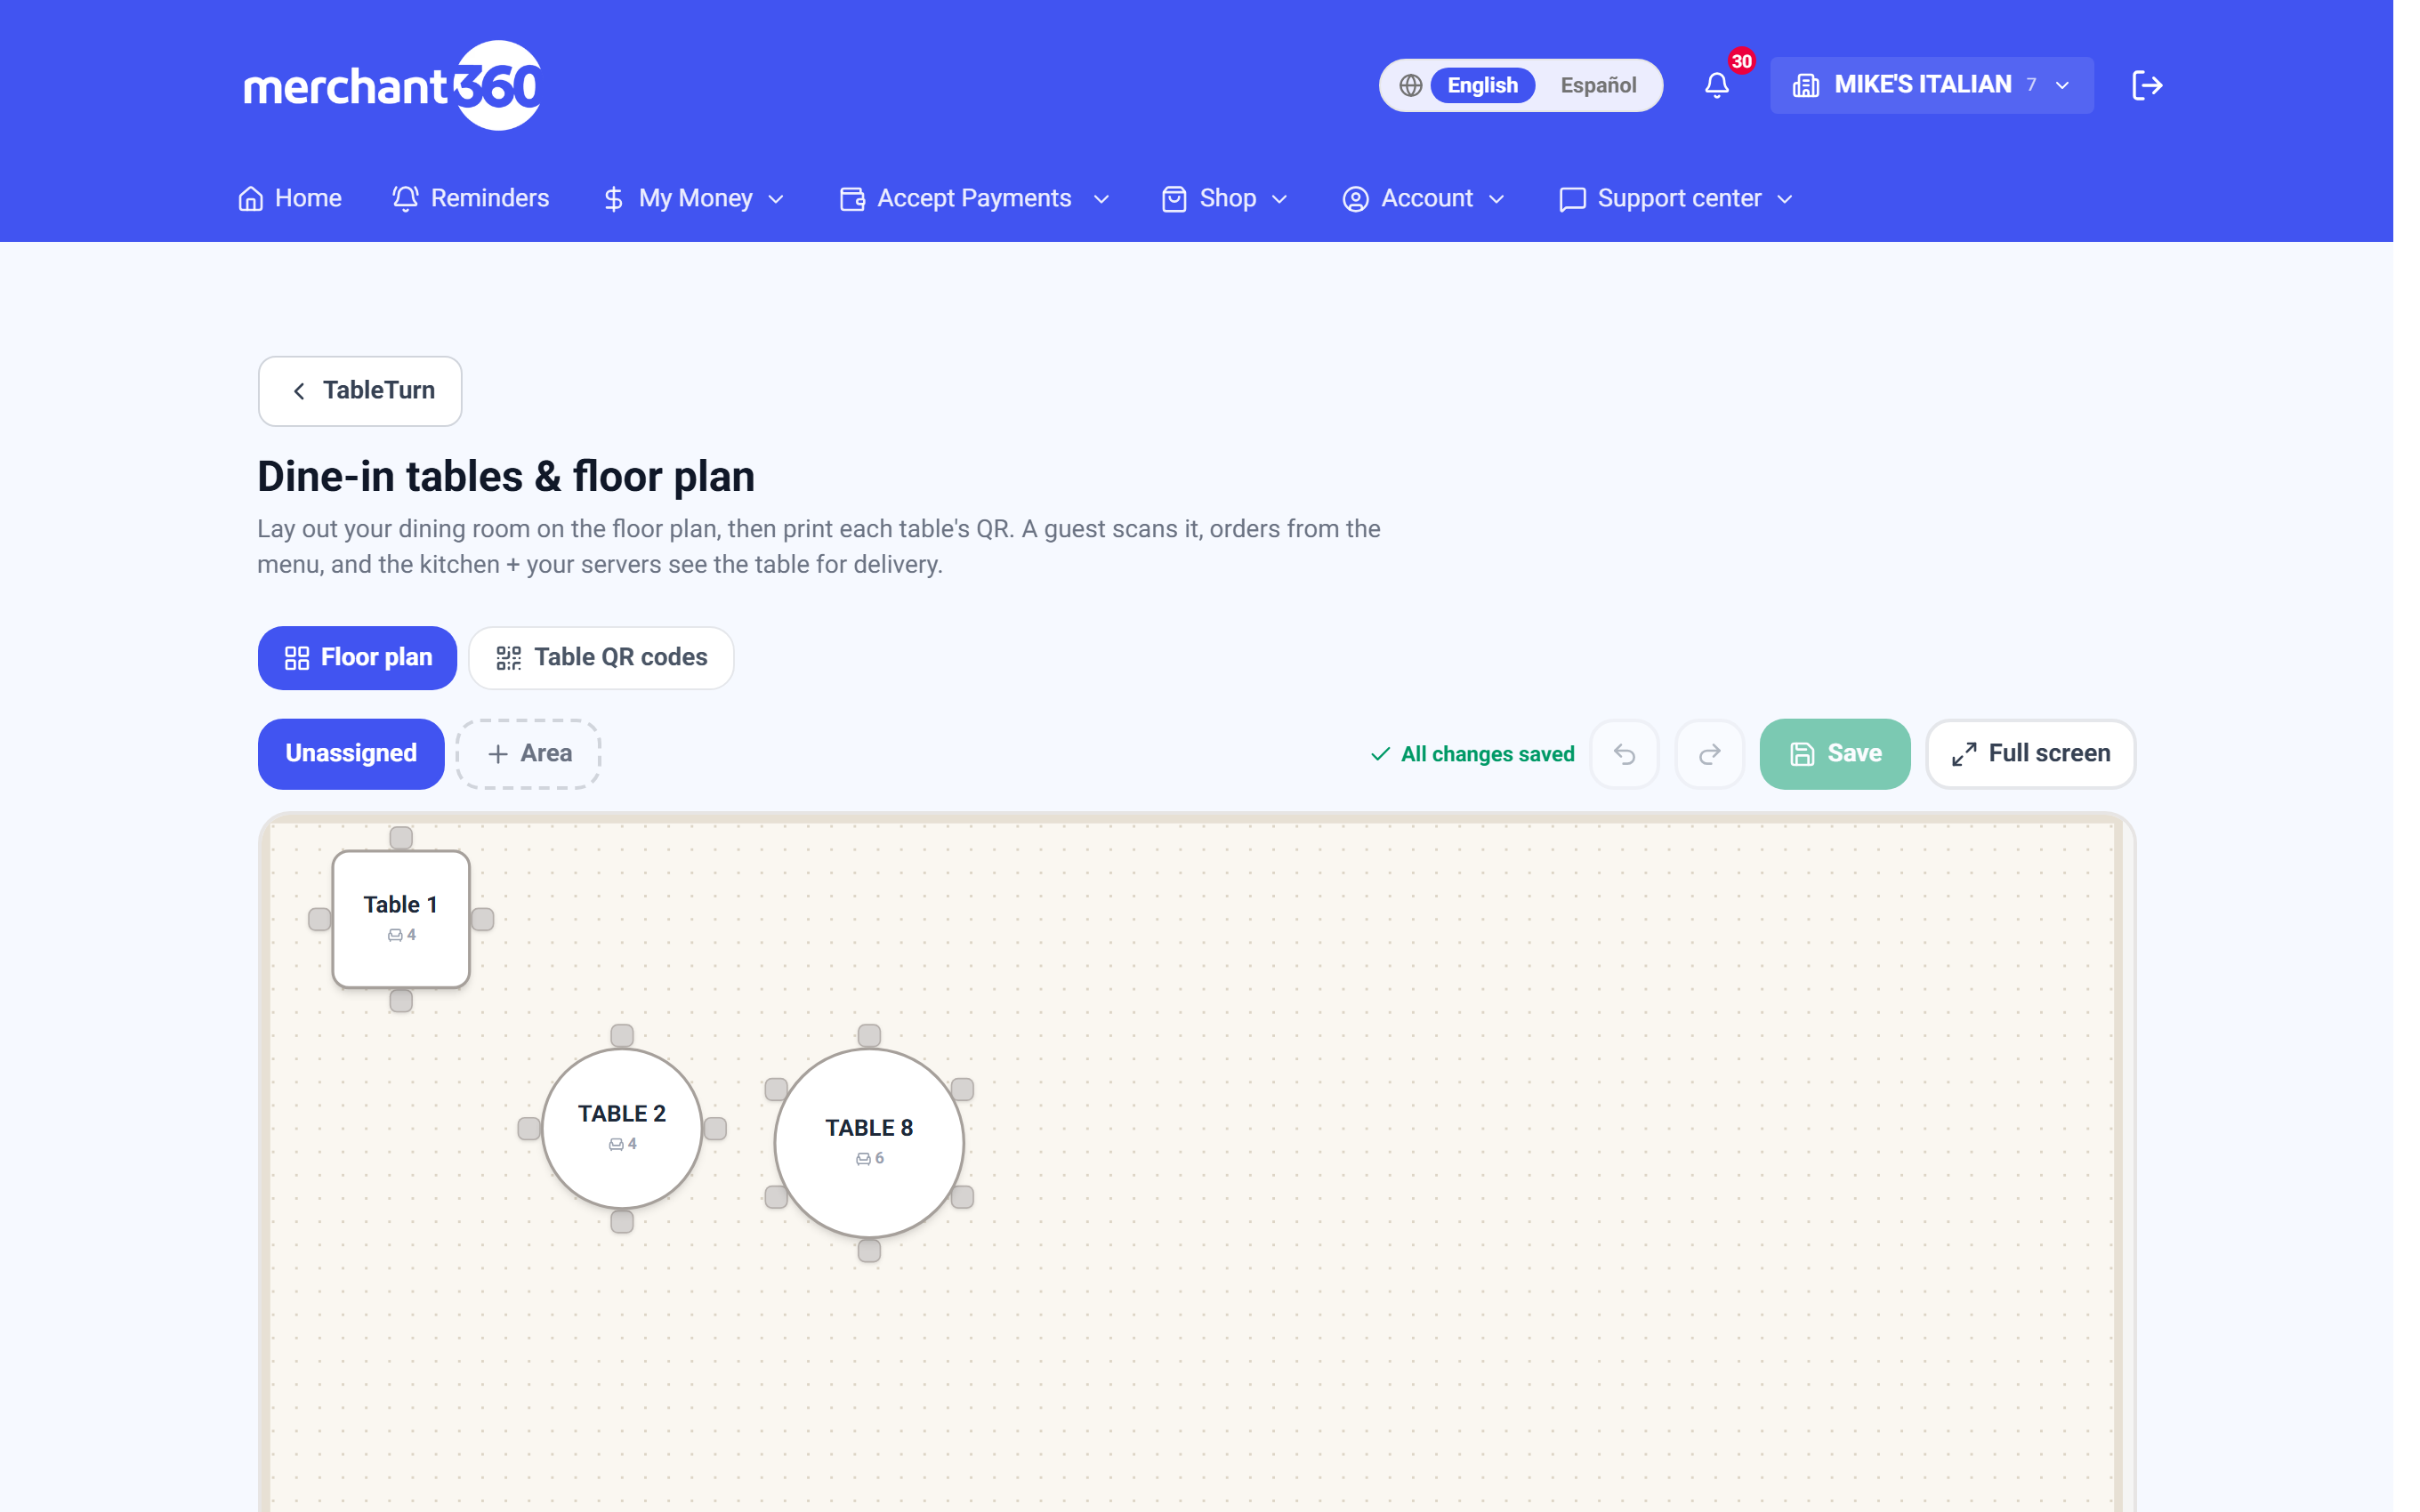
**Stool · 1** is a real one-top: it gets a QR and can hold a ticket. The **Bar** in the Decor palette is just scenery. If you sell seats at the bar, place stools, not a bar.
Shaping a table
Select anything and a small inspector floats over the top-right of the room.
Label renames it. Shape switches between square, rectangle, round and diamond (walls and L-shapes are decor-only shapes). Seats sets the cover count, which redraws the chairs and is what the register shows on an empty table. Width and Height resize it precisely, and Rotation turns it in 45° steps for an angled room.
The inspector also carries Duplicate – the fastest way to lay out a row of identical four-tops – and delete.
Everything snaps to an 8px grid, so tables line up without you fighting them. The grid button at the bottom-right hides the dots if you want to see the room clean.
Getting a room laid out quickly
- 1Add your area first, then drop the tables you need.
- 2If you created tables on the QR tab that aren't placed anywhere, an amber banner names them and offers to bring them into this area in one tap.
- 3Tap Tidy into grid to arrange everything in the current area neatly. It's undoable, so it's a safe starting point rather than a commitment.
- 4Now drag them to match your actual room, and add walls and a door so it's recognisable.
- 5Use Fit to screen or the zoom controls (30% to 150%) to see the whole room at once.
**Full screen** is worth using on a tablet – the canvas gets the whole display, which makes dragging far less fiddly than working in the page.
Saving, undo, and getting it wrong
The indicator at the top tells you exactly where you stand: Saving shortly… while a change settles, then All changes saved. There's a Save button if you'd rather not wait.
Undo and Redo cover moving, resizing and reshaping, so an accidental drag is one tap to reverse. They deliberately don't cross adding or deleting a table – those hit the server immediately, so undo stops at that boundary rather than pretending it can take a deletion back.
Rearranging the room mid-service is safe. Tables keep their identity, so a table with a live ticket keeps its ticket when you move it on the plan.
The back-office Floor view
Floor in the TableTurn back office is the manager's version: every dine-in table as a tile, showing its live orders, the item count, the total, how long the oldest ticket has been open, and its kitchen status. It refreshes every few seconds on its own.
The colours here answer a different question from the register's. They track the kitchen, not the seating: amber New, blue Preparing, green Ready. Green means food is up and nobody has run it yet – which is the single most useful thing on the screen.
You can move an order forward from here too, without going to the register or the kitchen.
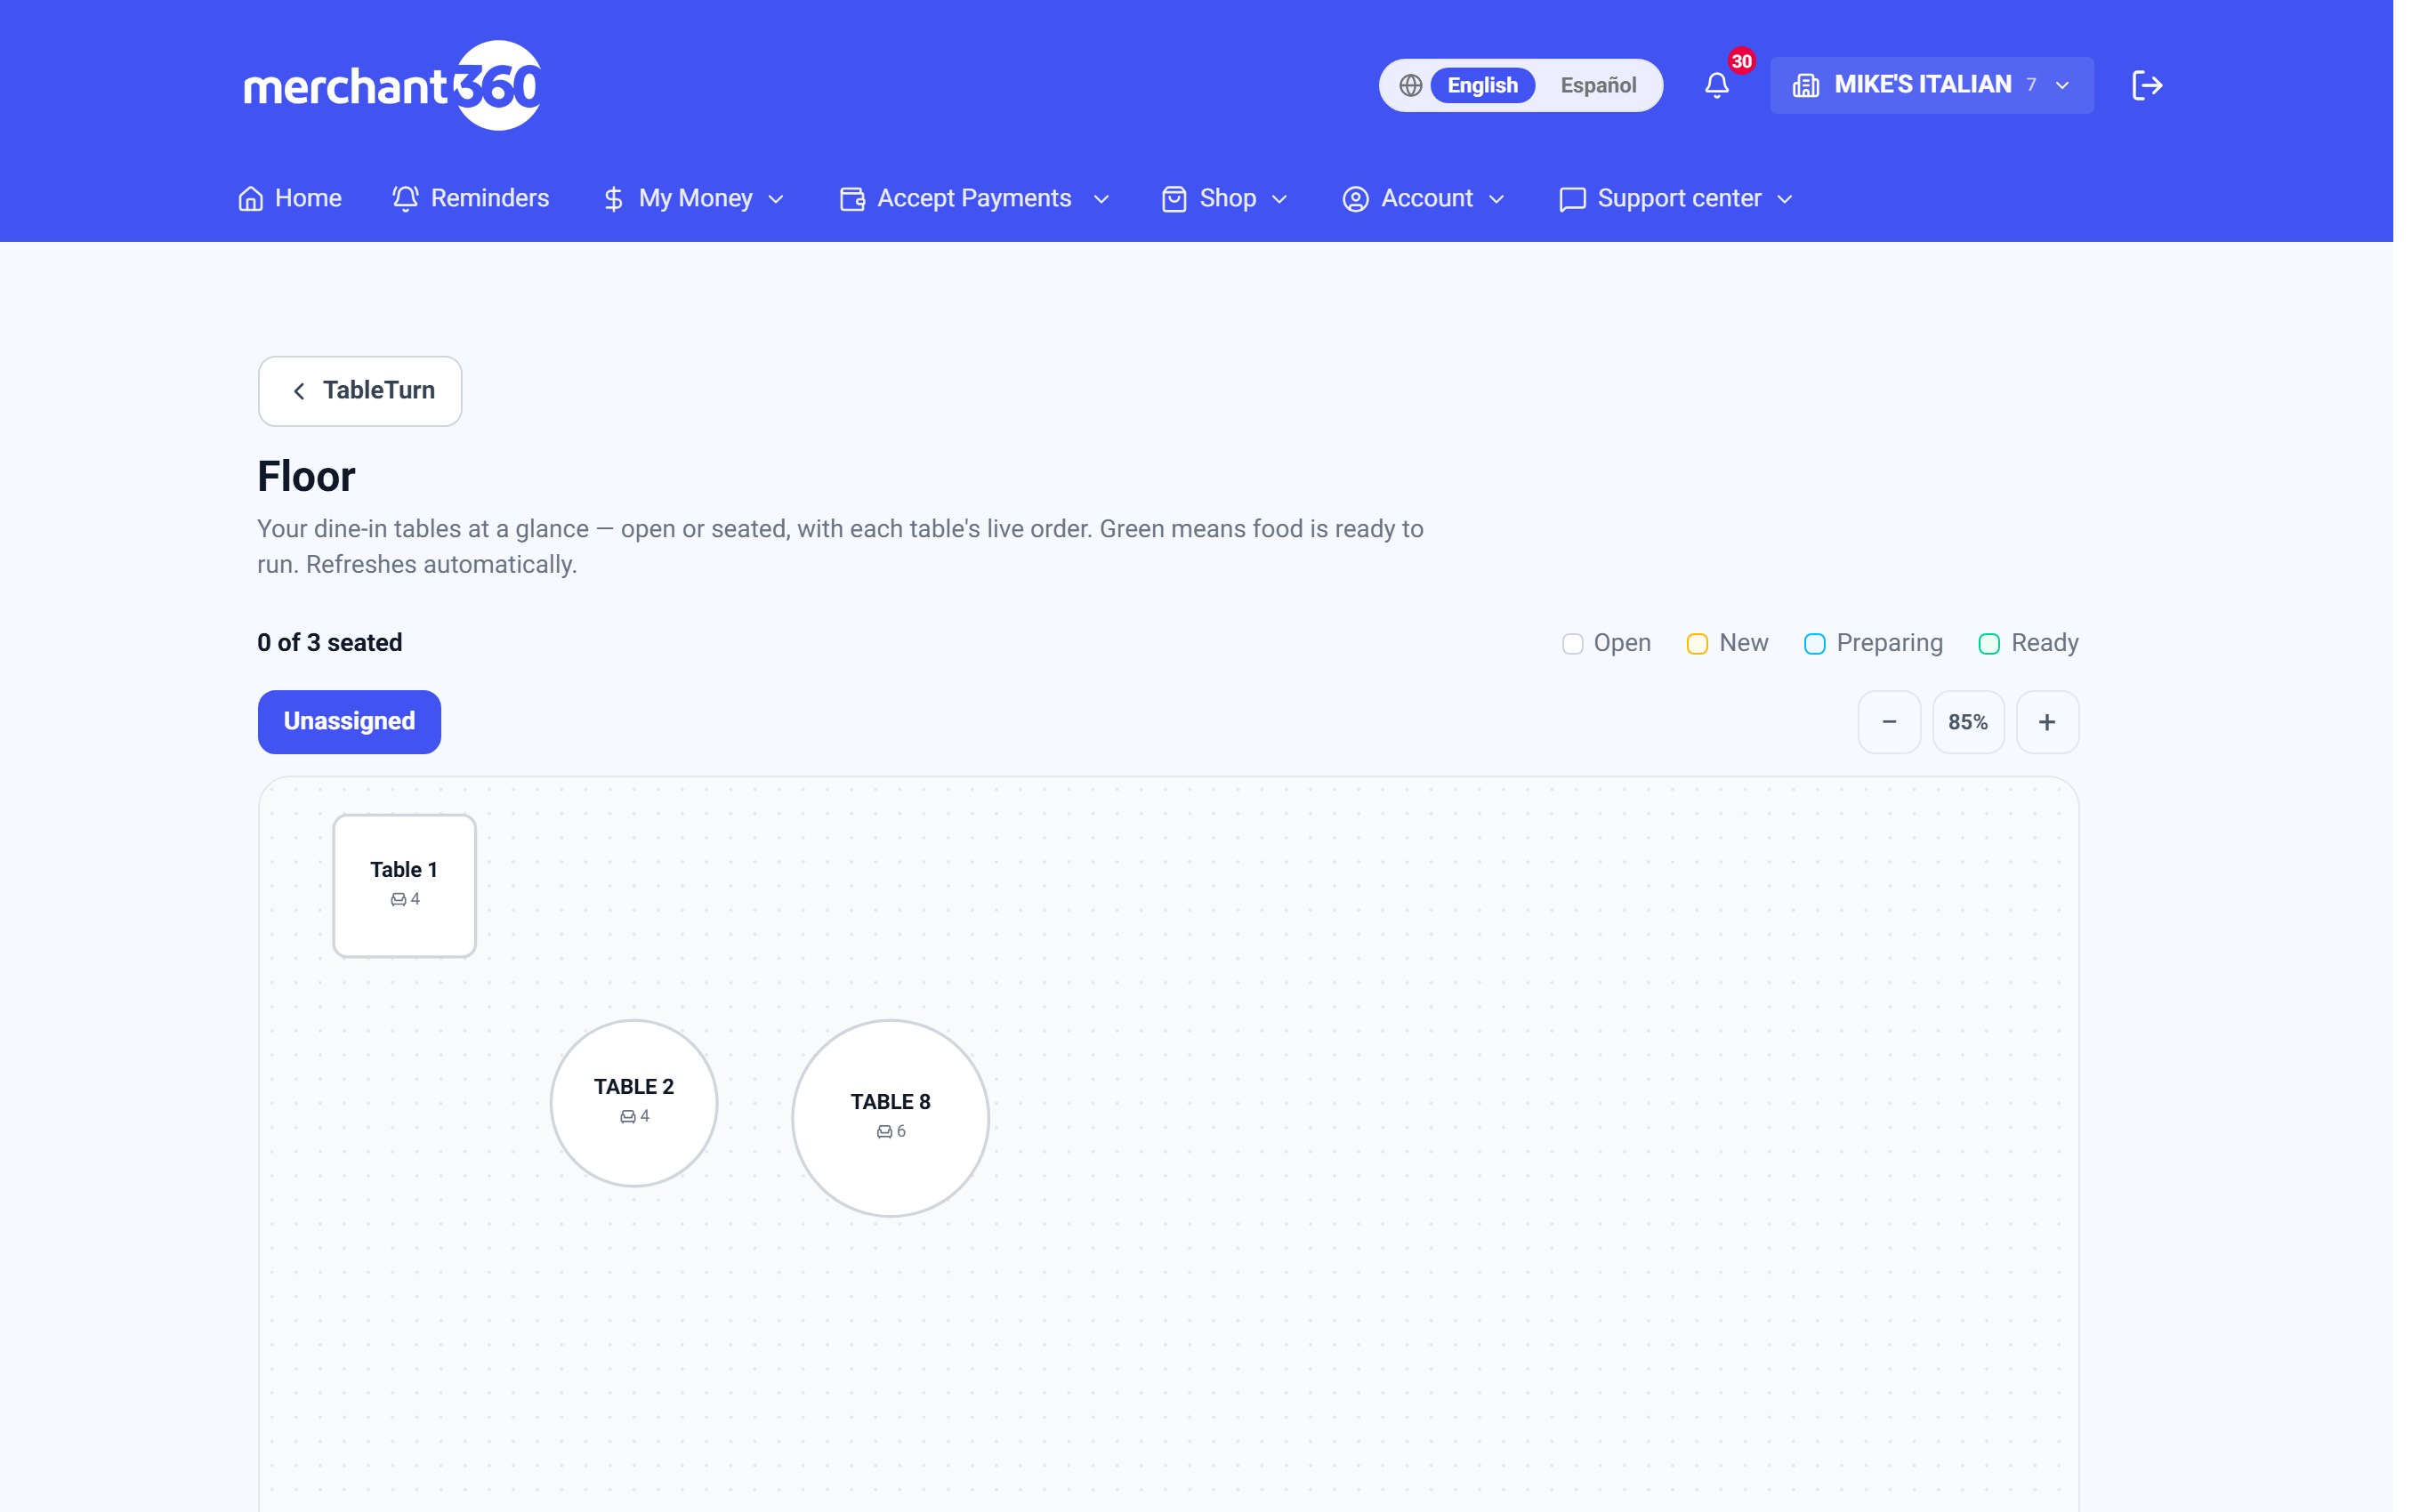
This is the screen to leave open on an office monitor during service. Green tiles are food going cold.
If the room doesn't look right
Tables are missing from an area. They're probably unassigned – check the Unassigned tab, or use the amber banner to pull them into the area you're editing.
A table won't take an order. Check it isn't disabled on the QR tab; a powered-off table stays on the plan but stops accepting orders.
The Floor page shows an upgrade prompt. The floor is a Lite+ feature. On Lite you still get the full register, the menu, the kitchen display and reporting – just not the floor-first workflow.
Nothing is laid out at all. The register falls back to a plain grid of table buttons, which works fine. Laying the room out is about speed of recognition, not capability.
Jumping between the Floorplan and Orders
The top bar's Floorplan button opens the floor from anywhere. Inside the floorplan header, the green Orders button jumps to All orders; inside All orders, a Floorplan button jumps back. The two screens a server bounces between all night are one tap apart in both directions.
All orders also has a By server chip next to Closed – tap it, pick a server from the list, and both the open tabs and the closed sales filter to that server's work. "All servers" clears it.